 We love this time of year! The air is crisp, the clothes are cozy, and we're all about the fall comfort foods. We could seriously eat this soup every day (for breakfast, lunch, and dinner!). Try it out for yourself to find out why we’re calling it THE BEST fall soup you’ll ever have!
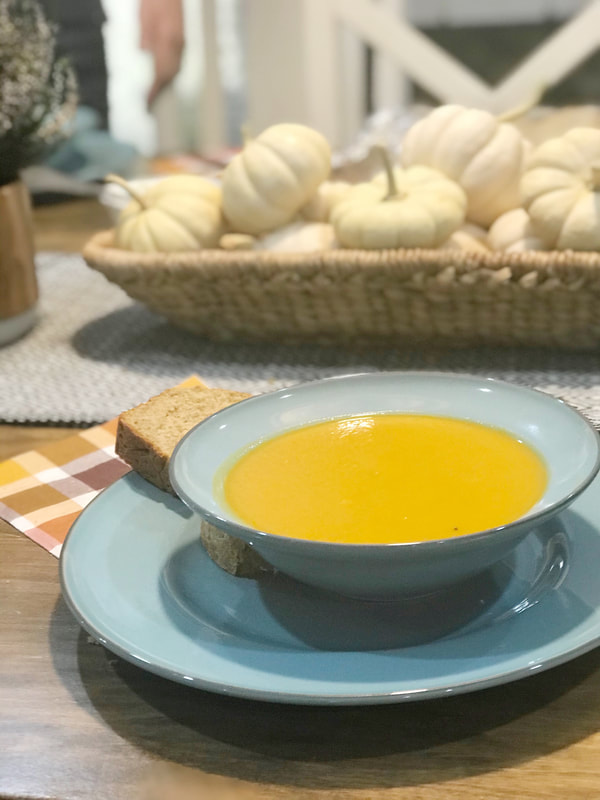
Curried sweet potato, carrot and apple soup Serves 10 What you’ll need 4 tbsps butter 2 yellow onions, chopped 6 large carrots, peeled and chopped 2 large sweet potatoes, peeled and chopped 1 tbsp curry powder (we’re generous with this and usually put in a dash more!) 8 cups low-sodium chicken broth (which is about two boxes) 2 tsps salt 1 apple, peeled and chopped 2 tbsps honey Black pepper What to do
We serve this soup with fresh bread and a dollop of plain Greek yogourt on top. Enjoy!
2 Comments
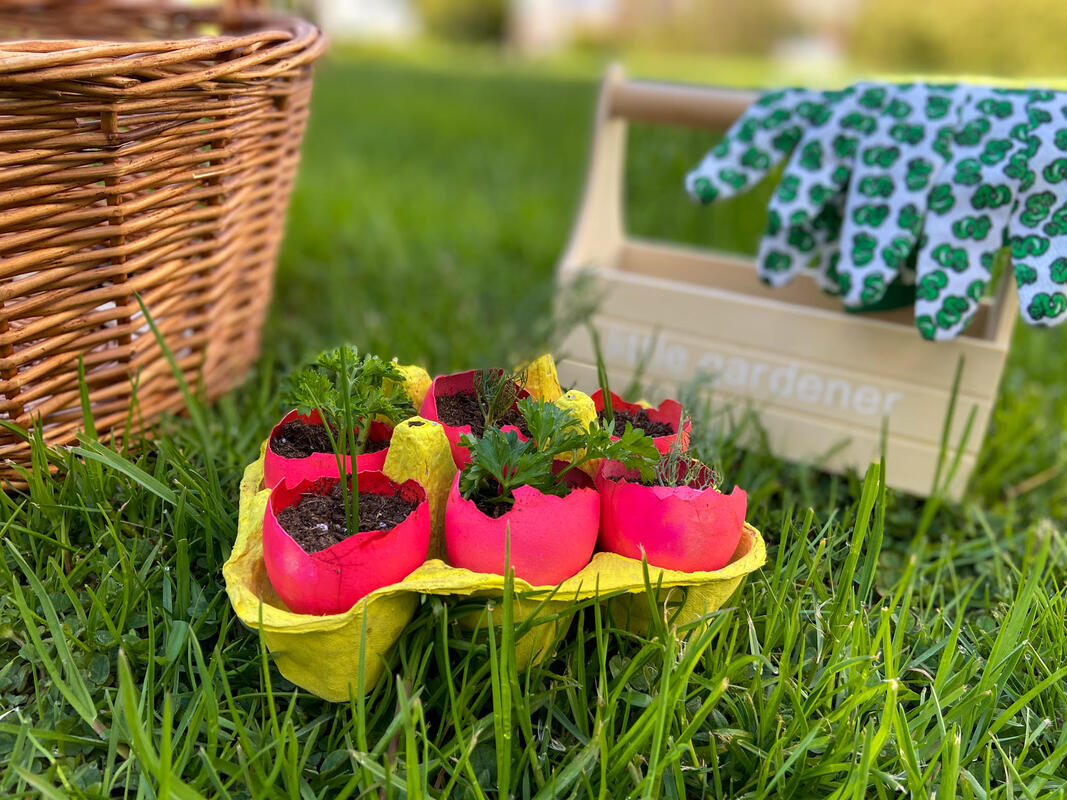 The sun is shining, the birds are chirping, and we are so ready to do all things spring! Quarantine life has brought the baker out of all of us and we’ve been going through a lot of eggs. Whether it’s the binder for our muffins or the wash for our rolls, there are so many ways this high- quality protein can be used in some of our favourite recipes. But the versatility doesn’t stop there! We’ve partnered with Egg Farmers of Canada to share with you this super simple spring activity that cuts down on waste and gets that green thumb going after a long winter hibernation. The mighty Canadian egg is not only a delicious ingredient - it’s also a climate-smart choice and sustainable food staple! We’re taking our eggs one step further and going full-on sustainable by upcycling the discarded shells. Check out how you can create your own adorable and eco-friendly DIY seed starters. DIY Seed Starter Here’s what you’ll need: - eggshells - egg cups - potting soil and spoon - awl/needle/pin (anything long and sharp) - knife - seeds Step 1: Carefully crack the top third of the egg by tapping the egg on the edge of a bowl or using a sharp knife. If you choose to dye your eggs, complete this step after the shells are dyed. Step 2: Empty out the eggshells completely. Step 3: Wash the eggshells out well with water. Step 4: Poke a hole in the very bottom of the empty shell with your sharp object (this hole provides drainage so the roots of your plant don’t drown). Step 5: Using a small spoon, fill the eggshell with moist potting soil (if the potting soil is dry, spray it with water from a spray bottle as you fill the eggshell). Step 6: Add seeds according to the directions on the seed package that you purchase. Step 7: After you have planted the seeds, put the eggshell planter into the egg carton if you wish. Expose your plant to sunlight and watch your plant grow! 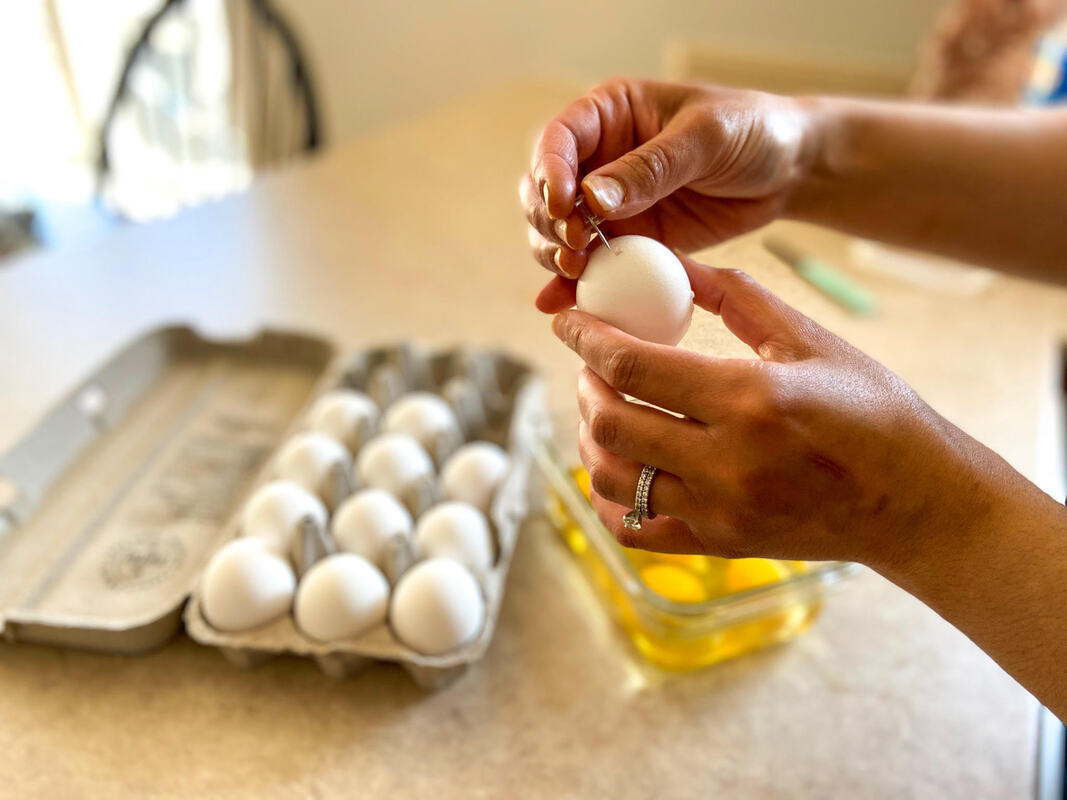 To take your seed starter to the next level, give your eggshells an extra pop with natural dyes that use ingredients you may already have in your fridge or pantry. Dye your eggshells before planting your seeds and give the shells lots of time to dry once the dye is applied. Natural Egg Dyes Here’s what you’ll need: - White eggs - Turmeric/Blueberries/Beets - Measuring cups/tablespoons - Medium pot - Strainer - Mixing bowls - Drying rack - Water - White vinegar Step 1: Bring 2 cups of water and 2 tablespoons of white vinegar to a boil in a medium pot. Step 2: Add your dye ingredients (instructions per ingredient below), lower heat and simmer for 30 minutes. Let cool. Step 3: Strain the dye to discard of any solids and let cool to room temperature. Step 4: Add eggs and let soak for 15-30 minutes (the longer the soak, the darker the colour!). Remove with tongs and let sit for 30 minutes on drying rack. Yellow Eggs/Turmeric: Add three tablespoons of turmeric to the boiling water. Simmer for 30 minutes, let cool, and soak eggs in mixture until they reach the desired shade. (FYI, since turmeric is notorious for staining your skin, you'll want to wear rubber gloves when handling yellow eggs.) Dark Blue Eggs/Blueberries: Add two cups of blueberries to mixture. Simmer for 30 minutes, strain, and let eggs sit in liquid for 30 minutes or more for deeper tones. Pink Eggs/Beets: Soak two cups of chopped beets in mixture for 30 minutes. Strain, then allow eggs to sit in liquid for 30 minutes or more, depending on how deep you want the colour to be. Now that your shells are picture perfect, you can move on to the planting. 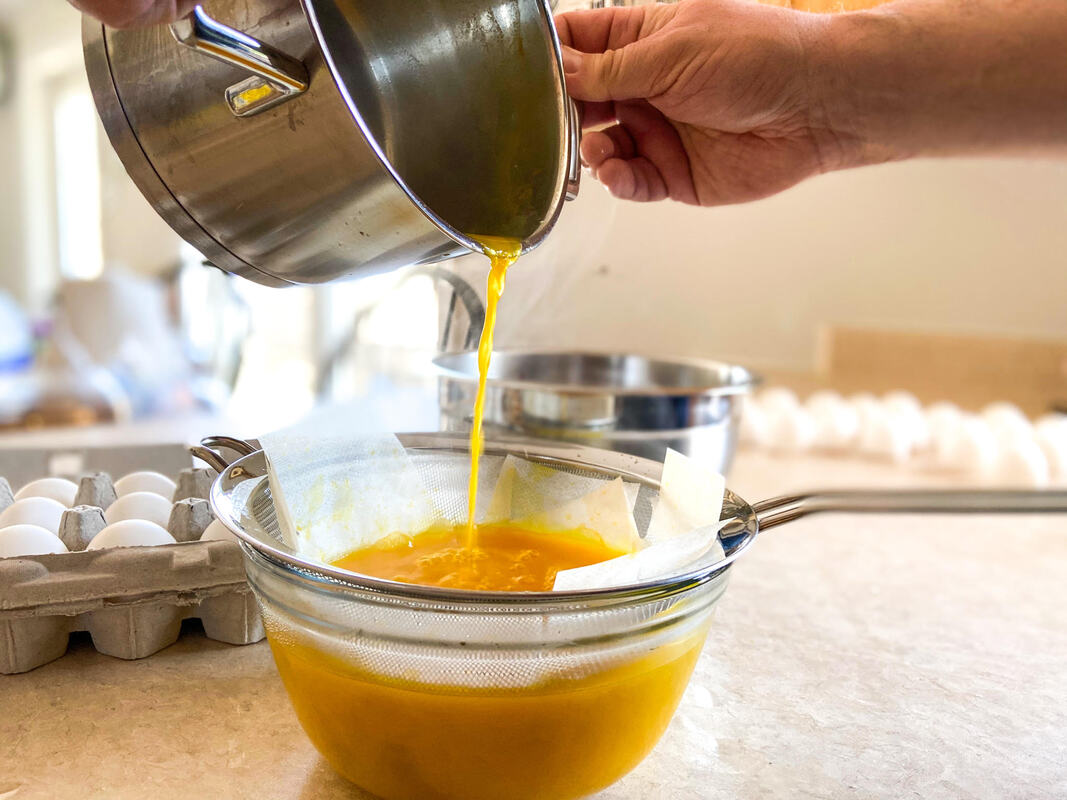 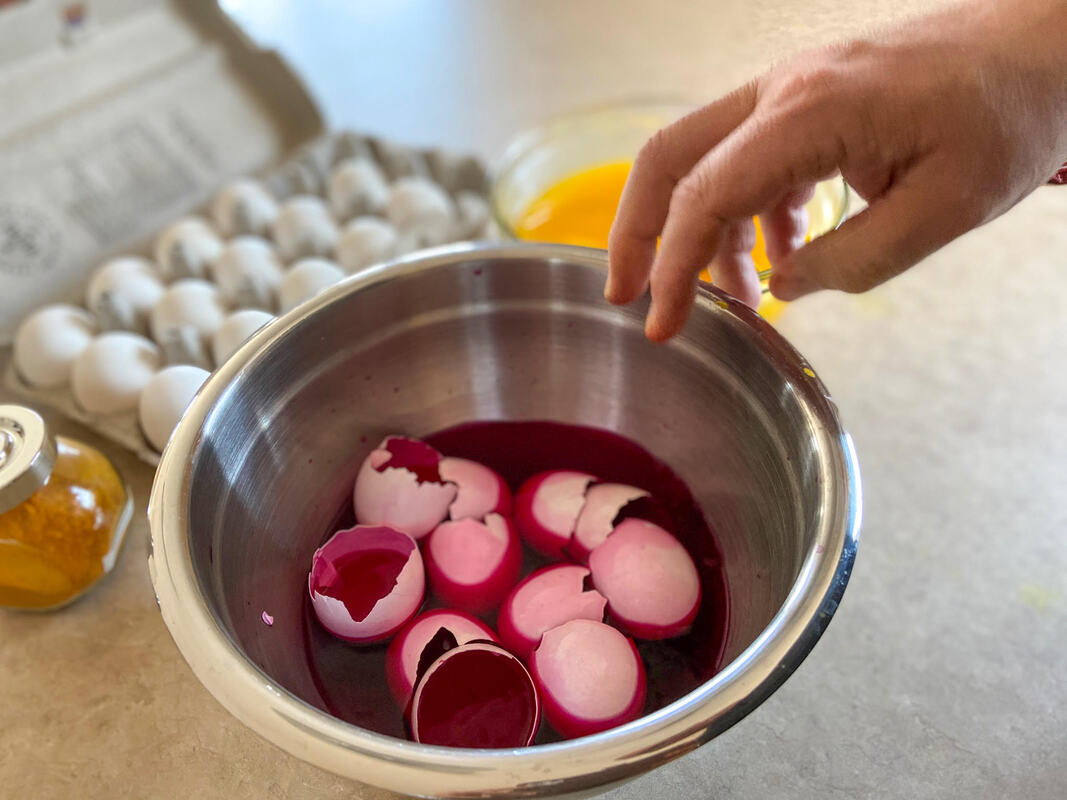  We’ve loved getting our little ones involved in our gardens this season and they’ve loved getting their hands dirty and watching their greens grow. Fun fact: eggshells are a great source of calcium carbonate for soil – an essential element that helps plants bloom. So the next time you’re wondering what to do with those crushed eggshells, sprinkle them over your soil. Your plants will thank you! Let’s welcome the warmer weather together and save our shells! Share your own spring-inspired egg recipes and projects and make sure to use the hashtag #CanadianEggs so we can see what you’re up to! Happy spring friends!  This blog post is sponsored by Egg Farmers of Canada.
We love all of the fun fall activities we can now share with our little ones. And top of the list is always apple picking at one of the local orchards. So this week we're sharing two of our favourite recipes featuring the oh-so-delicious apple. We love these simple bites because they don't take a ton of prep time, the ingredient list is low, and our guests always come back for more. So grab your apple haul, and give these favourites a try! Happy cooking and happy fall! Apple chips 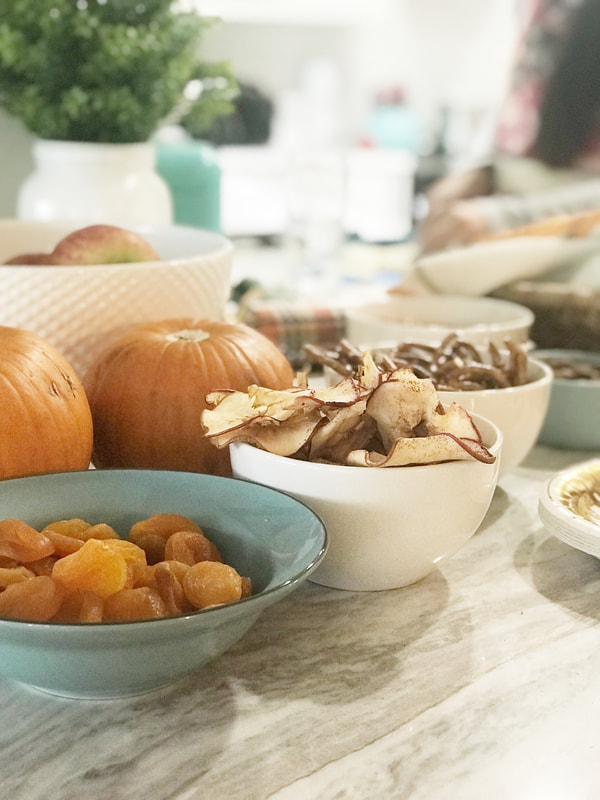 Ingredients 4 apples, very thinly sliced 4 tsp sugar 1 tsp cinnamon Directions 1. Preheat oven to 200 F. Place parchment paper onto two large baking sheets. You can also place a heat-safe cooling rack on top of the baking sheets. 2. In a large bowl, toss apples with sugar and cinnamon. 3. Place apples onto baking sheets, making sure no apples overlap. 4. Cook for 2-3 hours, turning halfway through cooking time. Apples should be dried out and somewhat crisp but still pliable. Baked brie and apples 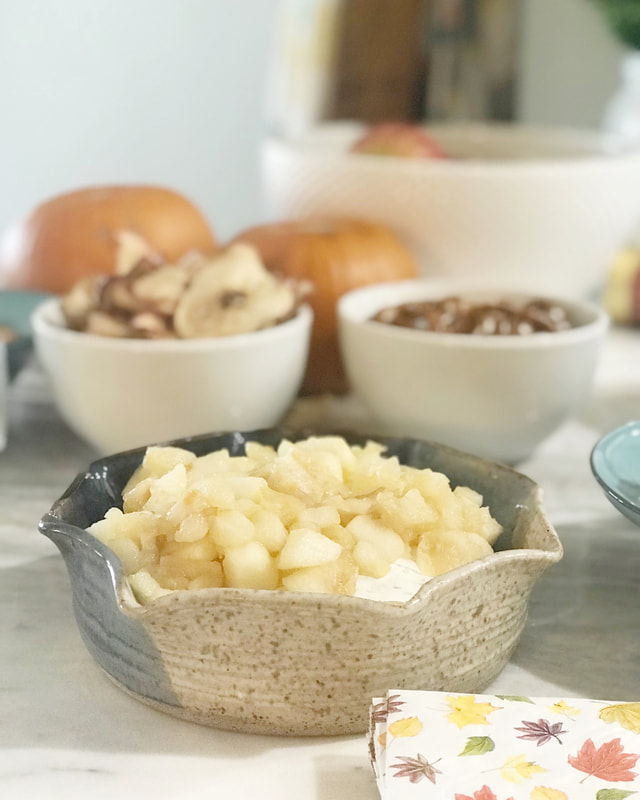 Ingredients
8-ounce wheel of brie 1 tbsp of butter 2 large apples, peeled and chopped 2 tbsp of brown sugar Directions 1. Preheat oven to 350 F. 2. Place the wheel of brie in a ceramic baking dish or on a baking sheet lined with parchment paper. Bake for 10-12 minutes. 3. Melt butter in small saucepan on medium heat. Add the chopped apples and brown sugar. Cook until apples are soft, about five minutes, 4. Place baked brie on a serving dish. Top with apple mixture. Serve immediately with pita chips and/or fresh bread. What are some of your go-to apple recipes? We're always looking to add to our list! xo Jacqueline and Lindsay 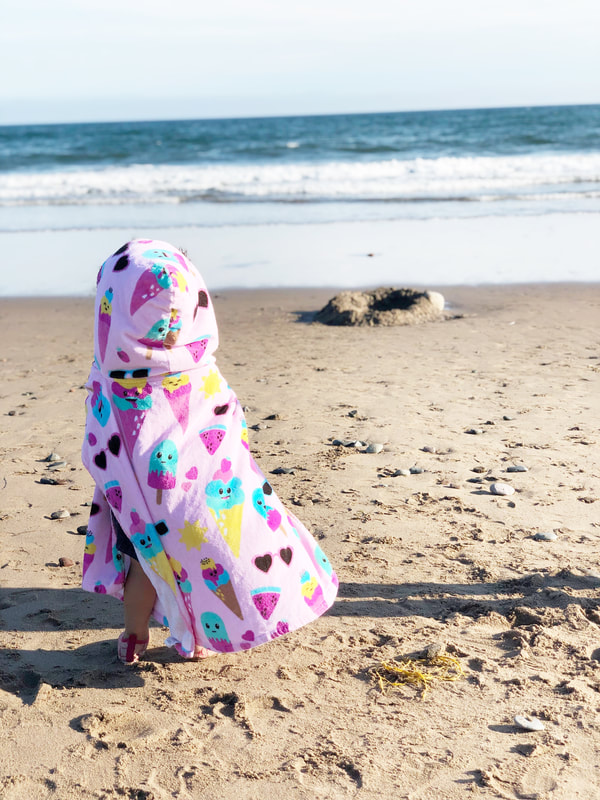 We love a good beach day. And since our little ones came on the scene, our simple beach tote of sunscreen and snacks just doesn't cut it anymore. If you're planning an escape filled with sand and sun, check out our must-have items for the best beach day with toddlers. Checklist
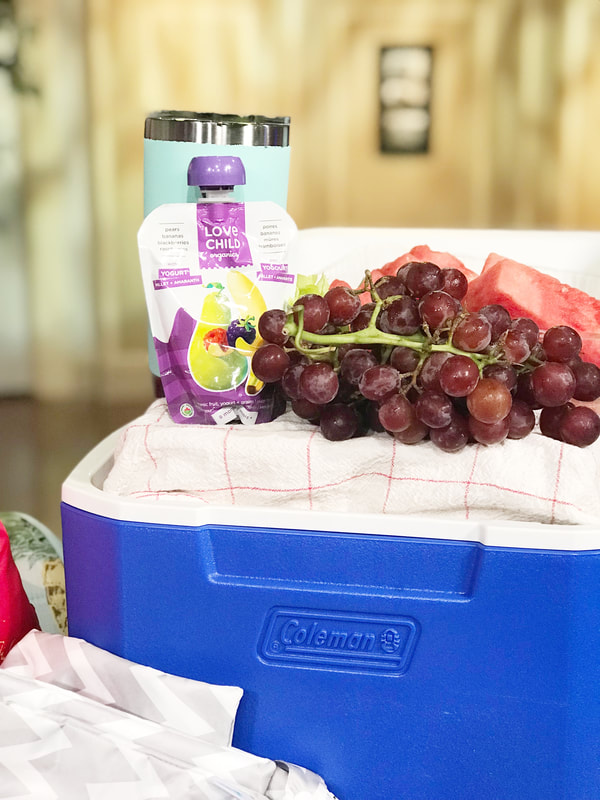
What's on your must-bring beach checklist? xo Jacqueline and Lindsay 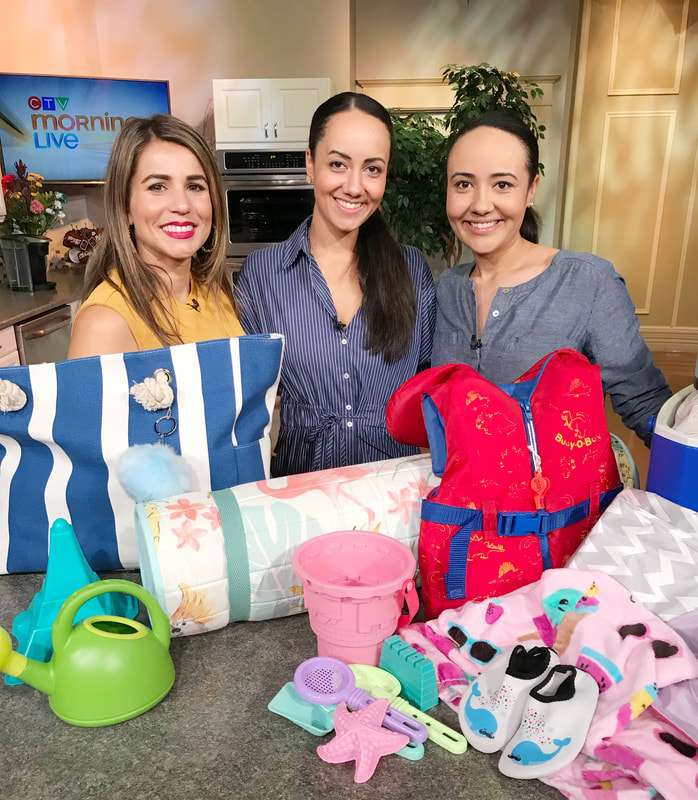  Earlier this month, we celebrated a very special little boy’s birthday with a teddy bear’s picnic themed party! This year was different than last year because my son grasped the concept of a party and he became more and more excited as the day approached. One day I asked him who he wanted me to invite to his party. He responded, “Nanny and cake”. So I made sure to invite Nanny and had an incredible cake made by Frosting. Growing up, I remember singing along with Anne Murray to Teddy Bear’s Picnic. Our mom even took us to several teddy bear’s picnics where we brought our favourite fluffy companion and packed a picnic lunch. I wanted to re-create this magic for my son. The first task was choosing a colour scheme. I wanted soft, cheerful colours and landed on pale pink, purple, turquoise, and yellow. Balloons in each of these colours were placed around the house to create a festive vibe. Bunting banners in the same soft colours were hung to brighten our space and set the tone. I created a little teddy bear adoption centre for our younger guests who each took home a teddy bear and an adoption certificate that included the child’s name and the name of their new furry friend. How cute are these teddy bears? The birthday boy loved taking home his own birthday teddy bear! 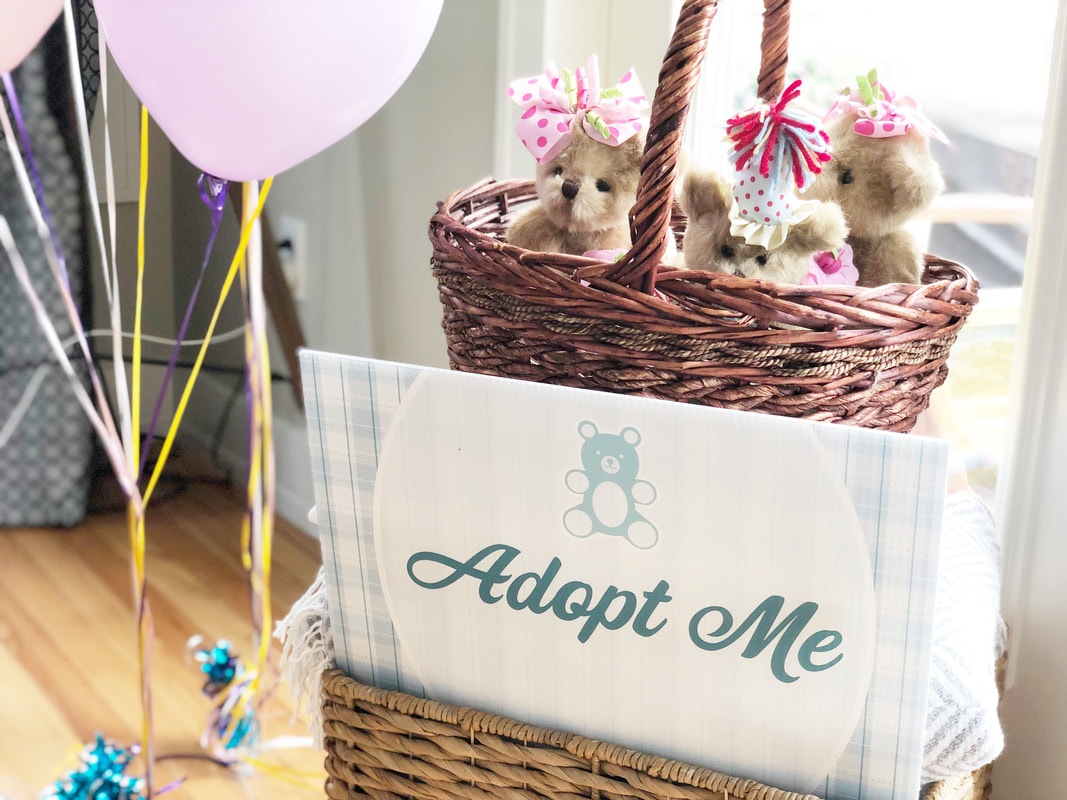 I placed teddy bears dressed in party hats throughout the space. Some bears could be found sipping tea out of pretty teacups! Now onto the picnic! My husband, Craig Flinn, seriously outdid himself. My mouth waters every time I think of this gorgeous picnic buffet. Craig repurposed wood and essentially made a stage for the food. Set atop wooden discs and planks were sandwiches (1. Roast beef, smoked gouda, onion jam, and rosemary mayo. 2. Roast chicken, bacon, tomato, lettuce, and chipotle mayo. 3. Ham and comte on a baguette), cheeses, jams, crackers, little cups filled with crudité, and a bountiful arrangement of fruit. Each guest was also offered individual bags of kettle chips. I ordered labels for the chips complete with little teddy bears on each one. Guests were given their own individual “picnic baskets” and invited to take whatever and however much they wanted. Needless to say, the amazing spread was enjoyed by all! 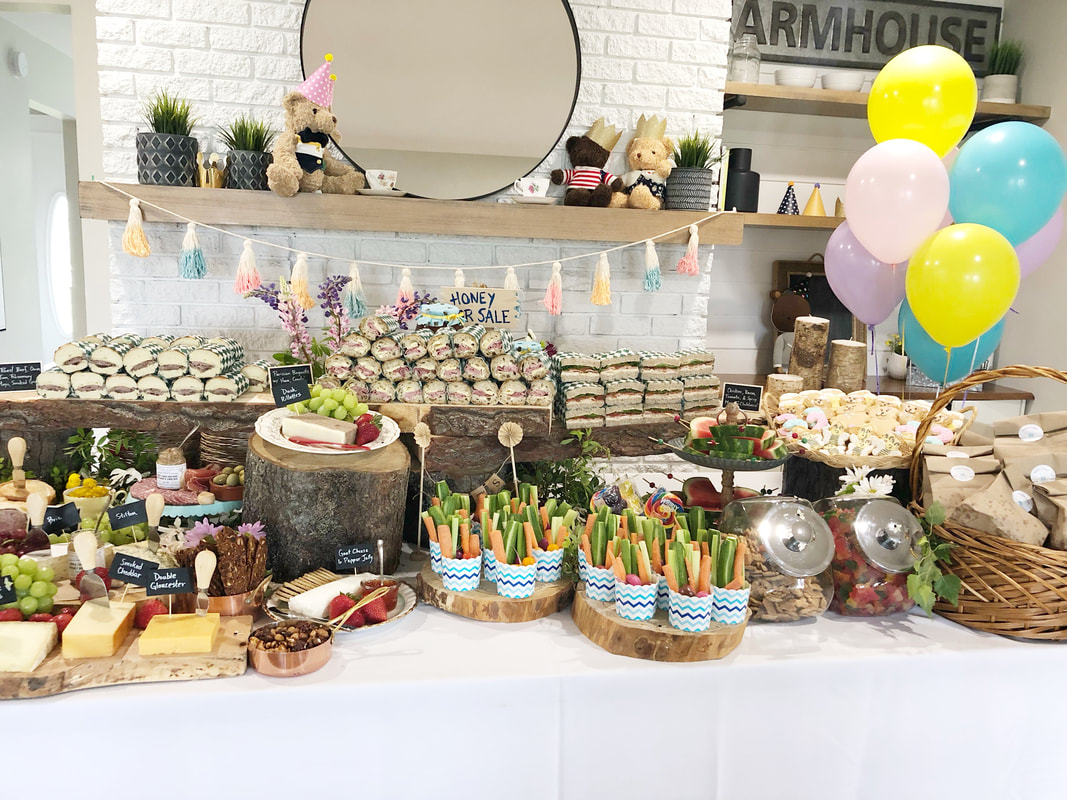 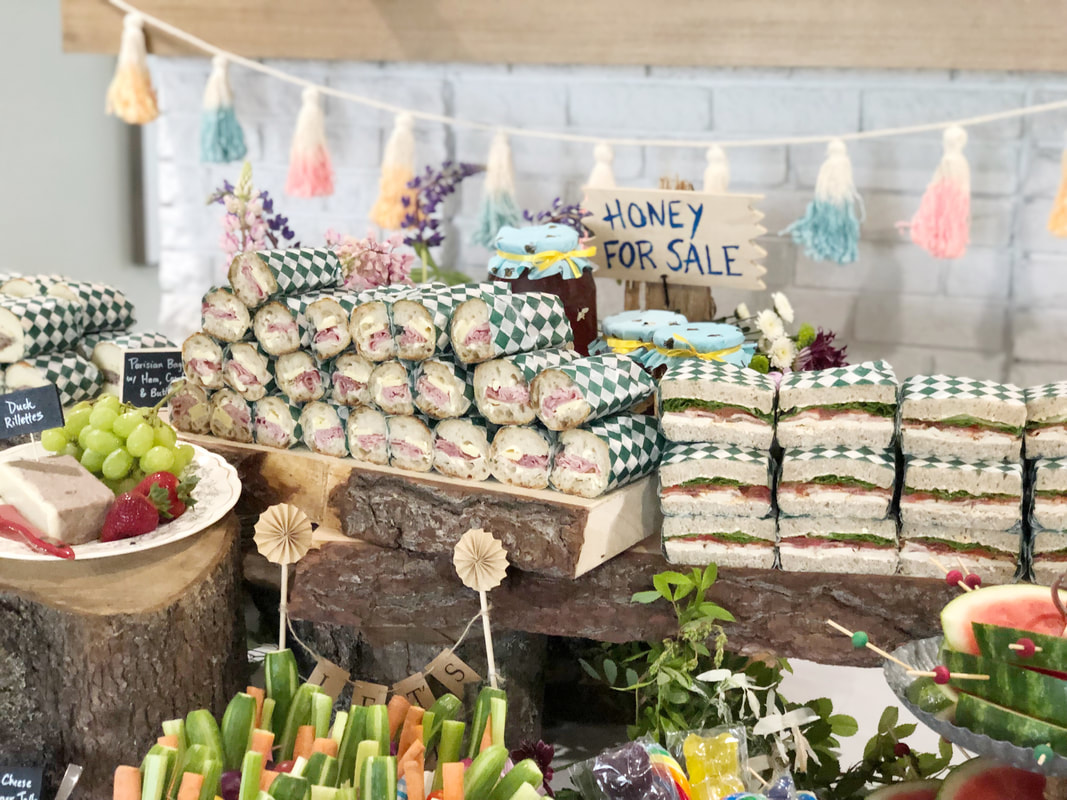 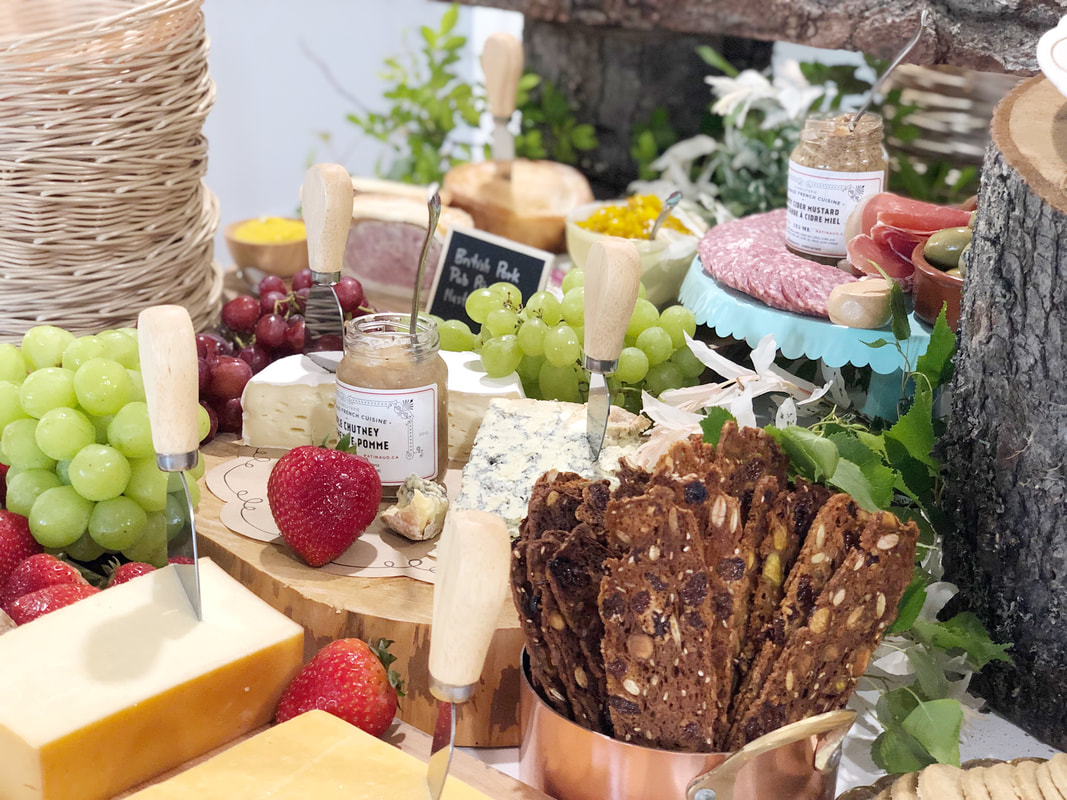 Craig also made yummy lemonade and we put out drink jars with lids and paper straws for each guest.  For dessert, guests enjoyed the cutest cookies I have ever seen. Christine’s Cookie Box created honeypots, bears, bees, picnic baskets, and the No. 2. These cookies went fast even though they were (almost) too cute to eat. Each child was given an individually-wrapped teddy bear cookie with their name on it to take home. The cake was a piece of art and tasted as good as it looked. This three-tier masterpiece had the most adorable details including bears enjoying a picnic on a patchwork picnic blanket and another bear covered in jam who enjoyed his picnic a little too much! 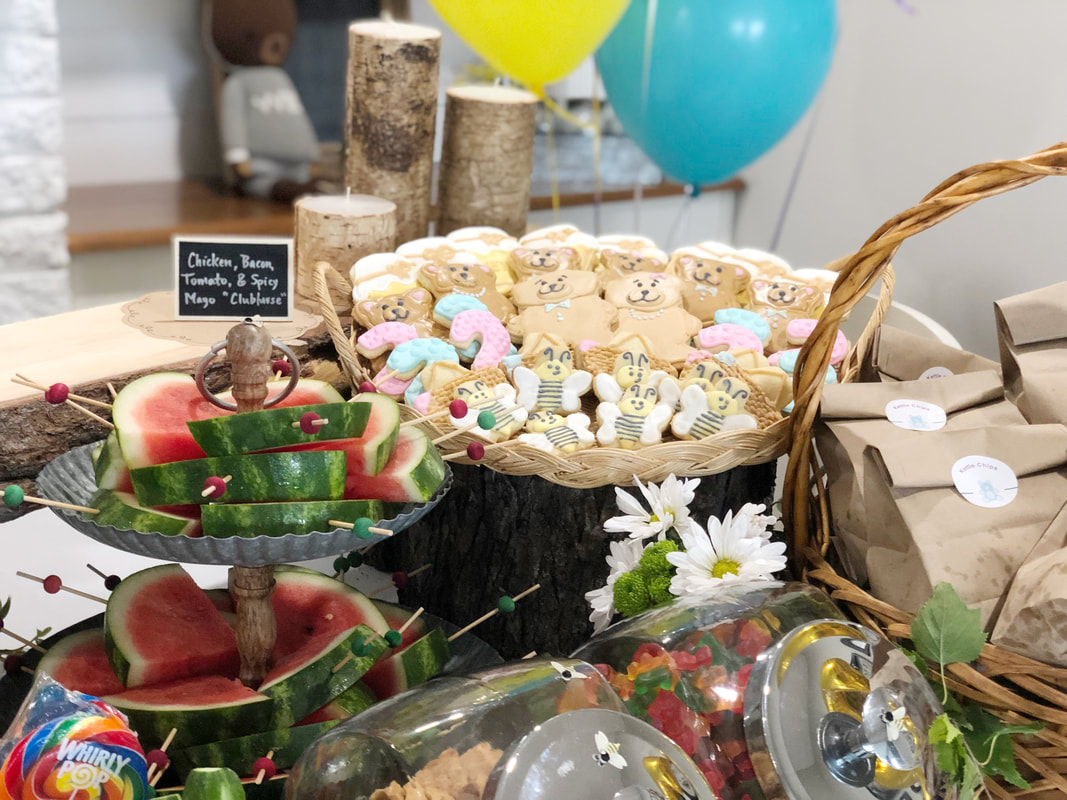   My son had such a fun time at his party. It was a day I will never forget. I really cannot put into words how grateful I am for his life. He is a dream come true. I love watching him grow and learn. He is a caring, loving, intelligent little boy who reminds me daily that miracles do happen. These past two years have been the best years of my life and even though there are challenges along the way, my baby boy reminds me to be thankful. Thank you to Lindsay and her husband, Chris, for co-hosting and for all your help with set-up and tear down. Thank you for surrounding my son with love every day and making him smile. Thank you to each guest who took the time to attend our picnic. And thank you to my husband. You never cease to amaze me. You are such a wonderful daddy (or “Daaaaaa” as you are sometimes called). I am so happy to be on this journey with you. Happy birthday, little boy! Mama loves you so much! 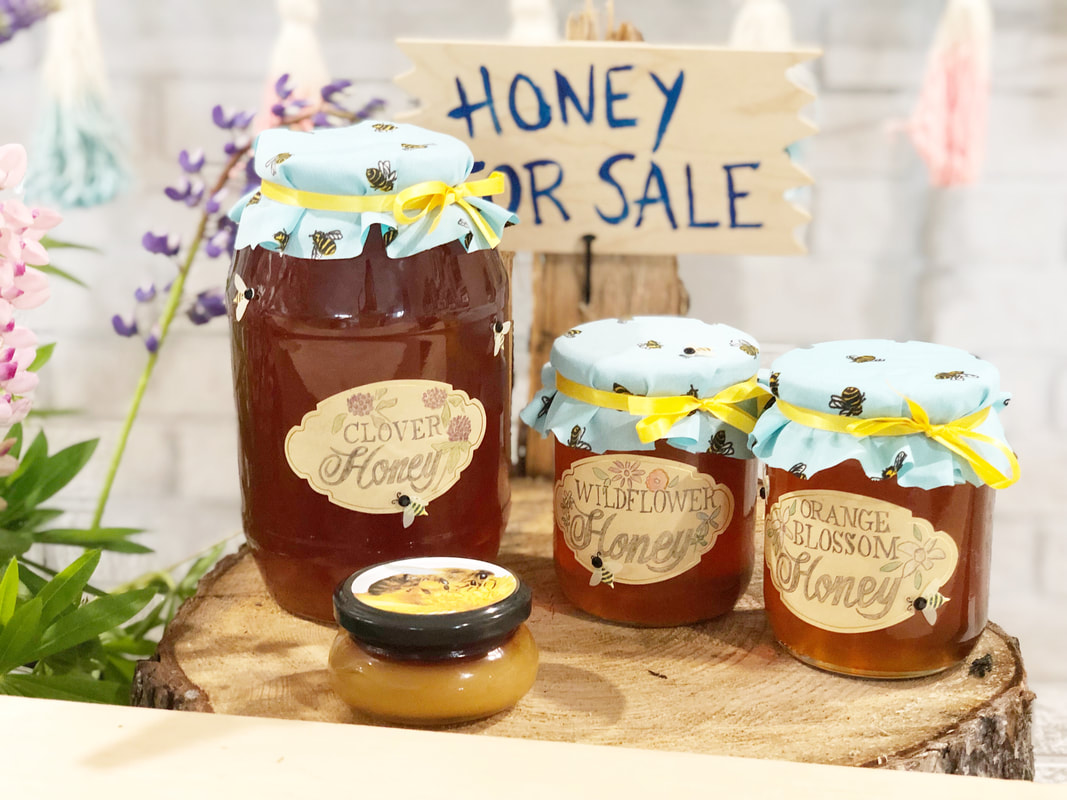 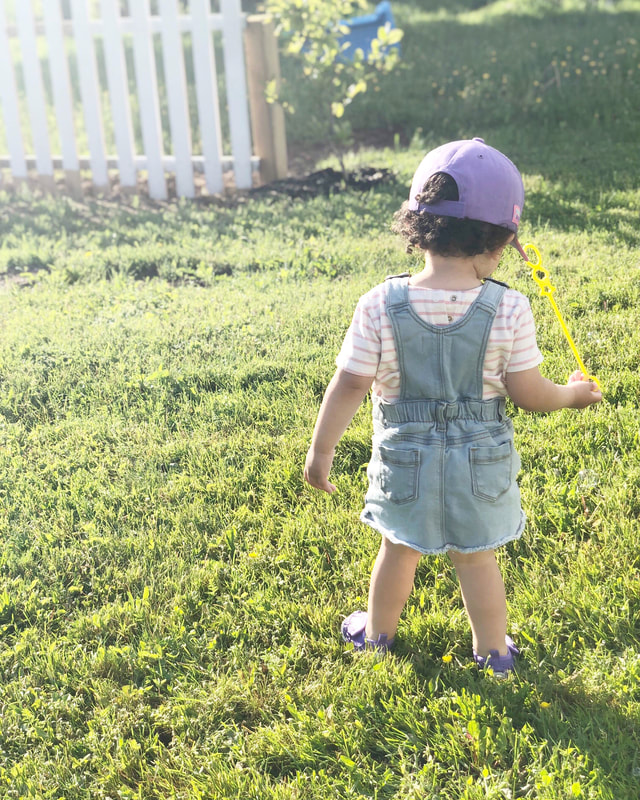 Summer has arrived and we’re so excited to finally be able to get outside with our little ones and enjoy the warmer temps. We’re sharing a few of our top tips for summer fun and an oh-so-adorable DIY that is low on materials and mess and high on fun! Keep it simple Our kids get pumped for the smallest things, which takes a lot of pressure off of us when planning daily activities. Bubbles, sidewalk chalk, nature walks, and a low-key game of eye spy provide big fun and low costs. Get outside Summer in Nova Scotia can be short, so we’re taking full advantage of the sunshine whenever we can. Grab a hat, sunscreen, bug spray, and bottle of water and get outside and enjoy the great outdoors. Include them in your daily activities If gardening is on your summer to-do list then break out the watering cans and get some help from your mini. Our little ones water our gardens daily and they absolutely love it. You’re checking an item off of your list and they’re having fun. #momwin 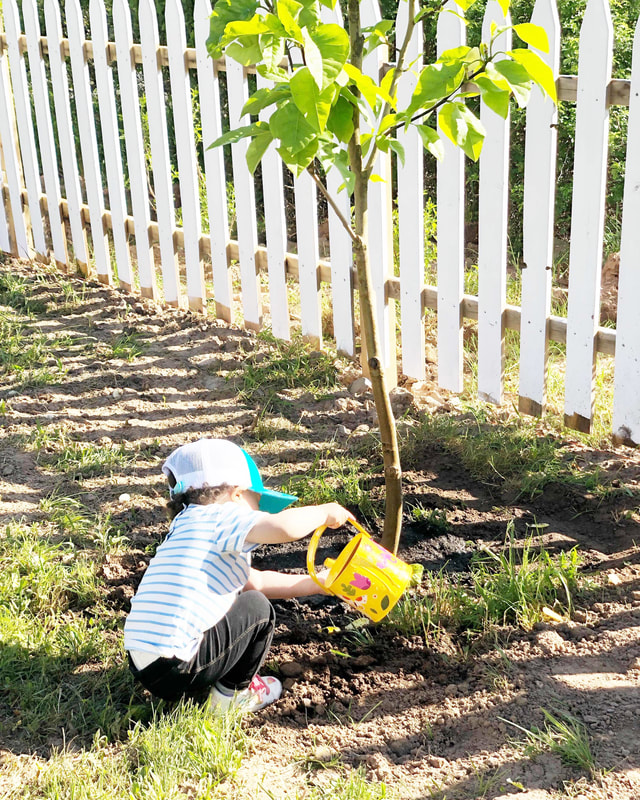 We recently did a segment on CTV Morning Live and shared how to make these super cute binoculars. Check out the step-by-step instructions below so you can add them to your fun in the sun itinerary. 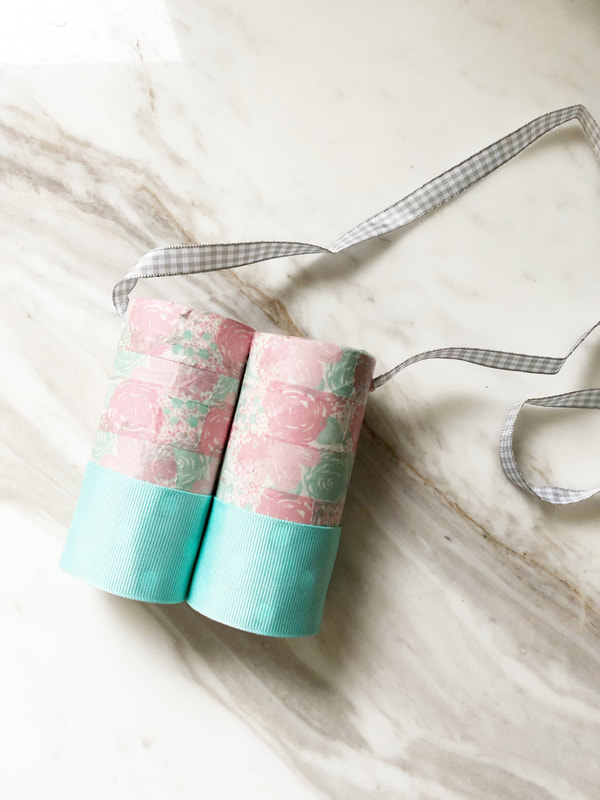 What you’ll need 2 toilet paper rolls Scissors Glue Ribbon, rope, or string Stickers Glitter Paint Markers Decorative tape Construction paper One-hole punch (or something sharp like scissors) How to assemble Using your one-hole punch or the tip of your scissors, pierce one hole near the top of each toilet paper roll. Have your kids decorate each roll to their liking. To make it easier to decorate, you can also cover each roll in construction paper first and then they can add their decor on top. Once decorated, add a strip of glue down one side of the toilet paper roll. (A glue gun would work best, but we just used Elmer’s white glue and it worked great as well.) Press the other roll against the glue strip and hold together for a few minutes to ensure they’re stuck together. Take your ribbon or rope and pull one end through the pierced hole in the toilet paper roll. Tie a knot. Do the same thing with the other end on the other toilet paper roll. Enjoy your binoculars on nature trails, walks in the park, or in your own backyard!  Check out our segment on CTV Morning Live to see our demo and to hear some of our top summer tips for toddlers!
Happy summer! xo Jacqueline and Lindsay Meal prep is a total game changer. Especially now that we’re moms, once 5 p.m. rolls around, the last thing we want to do is figure out what on earth we’re going to make for dinner. We haven’t gotten it down to a perfect rhythm just yet, but we’ve started to get into a bit of a meal-planning groove and we are loving the difference a little prep can make. To give you a bit of meal-planning motivation, we’re sharing some of our top tips to make dinnertime a breeze. And we’re even keeping it real by sharing one of our favourite takeout options thanks to Greco Pizza! Now if only we could find a way to make washing the dishes just as easy! Make a Plan Choose one night a week to make a plan. Carving out this time is essential to setting yourself up for a successful week ahead. Jacqueline likes to make her meal plan a week in advance. You may prefer to prep on the weekend. It doesn’t matter when you plan, just make sure you do it!  Choose your Proteins We like to choose a couple proteins to carry us through the week. For example, roasting a chicken allows you to enjoy a roast dinner one evening, chicken sandwiches with sweet potato fries another, and chicken curry the next night. If you’re serving a large family, roast a turkey to give yourself even more protein. Your protein doesn’t have to be meat. Jacqueline has a mild obsession with chickpeas. (That’s normal, right?) They are so versatile, packed with protein, and work perfectly in a quinoa salad or curry. One-Pot Wonders We love a good one-pot wonder. These dishes are usually easy to freeze, packed with flavour and make great weeknight dinners. Think soups and stews (using your protein of choice for the week), or casserole-type dishes like lasagne, mac and cheese, or shepherd’s pie. 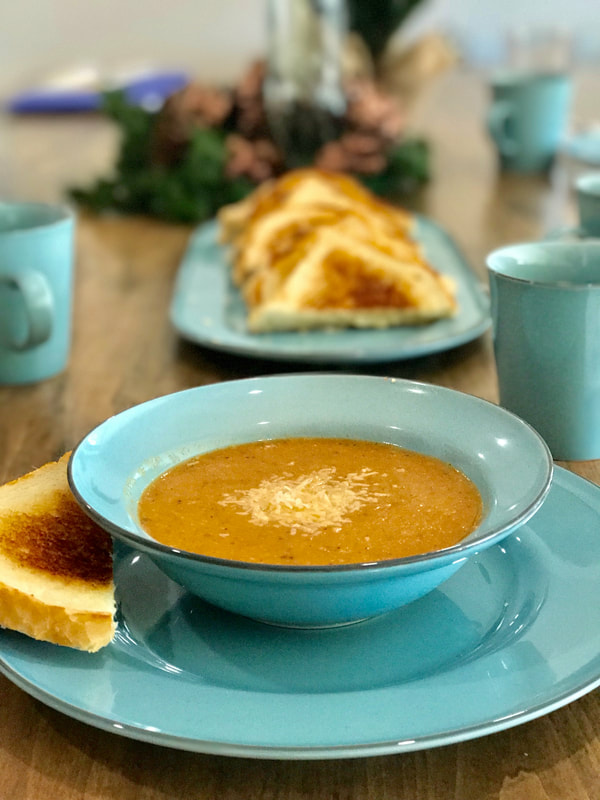 Think Big Anytime we make pasta sauce, soups, or curry, we make enough for a few meals and freeze the excess. We cannot tell you how many times dinner has been saved by a good ol’ freezer meal. You can also freeze meatballs and pizza dough. The options are endless. Treat yo’ Self! When we were in university, every Sunday, without fail, the whole family would get together for takeout pizza. Our favourite food mixed with our favourite people was the best way to head into a new week. We currently have Greco Pizza on speed dial (no shame). Did you know they have the largest party pizza in Atlantic Canada? It’s 24 oh-so-delicious slices of pizza goodness and our go-to for family pizza night. After a long week and after the meal prep is out of the way, we are all about kicking up our feet and digging into a hot pizza. No fuss. No mess. And definitely no disappointment. We have no idea what herbs and spices are sprinkled on their crust, but… Oh. My. Goodness. If pizza isn’t your thing (seriously though, how can pizza not be your thing?) Greco has lots of other options, including oven subs, donairs, salads, and donair egg rolls! Oh, and the garlic bread! Visit greco.ca to see the full menu and to order your own party in a box this weekend! 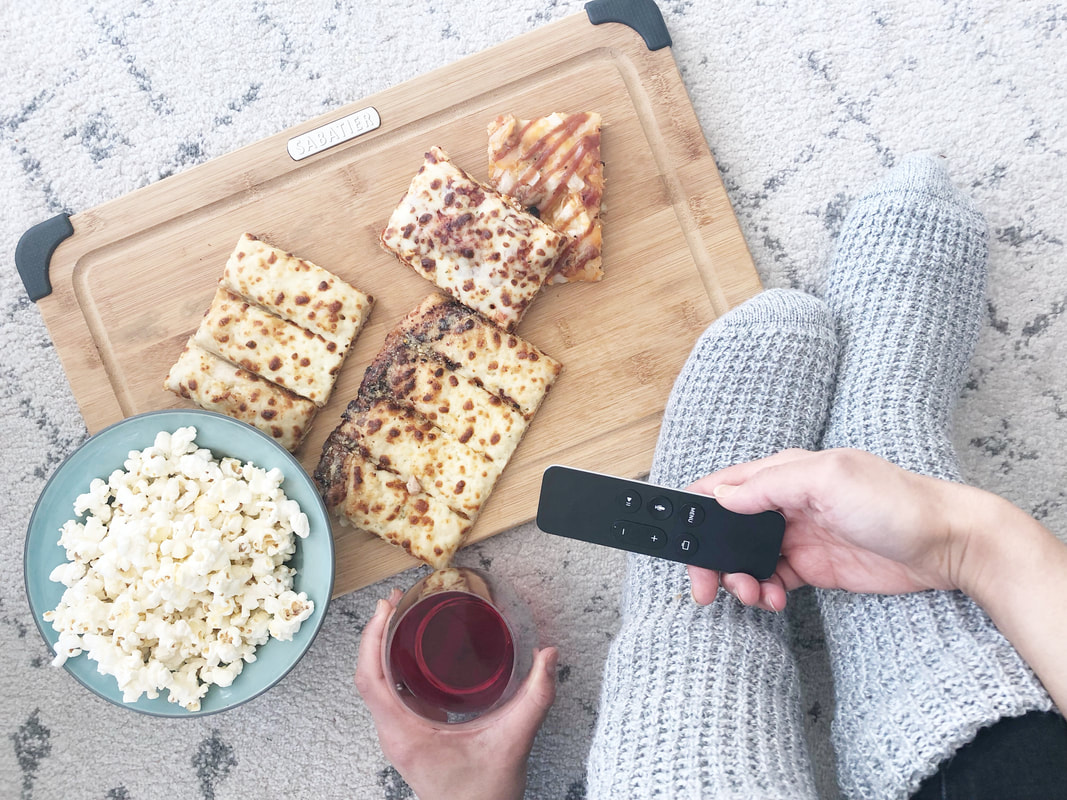   Happy planning lovelies!
xo Jacqueline and Lindsay [This post has been sponsored by Greco Pizza.] 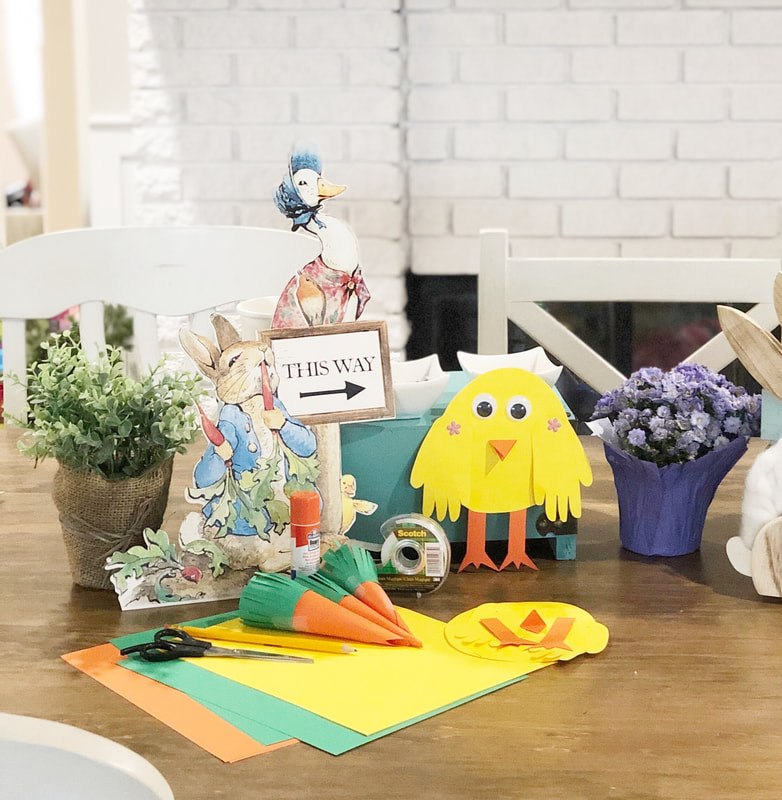 The countdown to Easter is on and we’re sharing two super simple Easter crafts for kids. For a demo of both crafts, scroll to the end of this post and check out our segment on CTV Morning Live. Happy crafting!
Yellow Chick This is a cute idea that uses your kid’s hands to make the wings! What You’ll Need
Instructions Cut all of your shapes out first. The wings are shaped by tracing your little one’s hands on the yellow cardstock with a pencil. For the chick’s body, cut out a circle using the yellow cardstock. Use the orange cardstock to cut out the feet and a beak. The beak is the shape of a diamond. Pierce holes with a pencil or scissors on both sides of the yellow circle and at the top of the wings. Attach the wings to the circle using two fasteners. Using your glue stick, glue the legs onto the back of the yellow circle. Fold the orange diamond in half to make the beak. Apply glue to one half of the folded diamond and attach it to the front of the chick. Apply glue to the googly eyes and attach them to the front of the chick. If this is a gift for a loved one, you can have your little one draw a picture or sign their name on the back of the chick. It’s a creative keepsake and a homemade Easter card! Paper carrots We know the Easter Bunny loves carrots, so this is a little treat that would make a sweet gift. These paper carrots would also make a cute centrepiece in a wicker basket. What You’ll Need
Instructions Cut a rounded-bottom triangle into the orange cardstock. The size of the triangle just depends on how big you want to make the carrots. Cut a wide strip out of the green cardstock. Make sure the green band wraps around the entire top of the carrot and you have a little bit of overlap. Cut slits into the green paper, but make sure to leave about two centimetres uncut at the bottom so you have room to add glue. Once the pieces are cut, add a strip of glue to one side of the orange cardstock and roll the paper to make a cone. You can also add a piece of clear tape to make sure it stays together. Take your green band of paper and add glue directly under the cut strips. Wrap the green paper around the top of the carrot and press down as you go to make sure it sticks. You can add another piece of tape here to make sure it stays together. Happy Easter! For a full demo of both crafts, click here: http://bit.ly/2DiFiG0  We've talked about purging in our checklists pretty much every month, and after binge-watching Tidying Up on Netflix, we've become slightly obsessed with de-cluttering every corner of our home. If we're being honest, our Everest has been clothing. We love to shop and we love to tell ourselves that at some point, in the next five years, we might have a need for that purple poncho with the gold tassels. So this week, we're sharing a few helpful tips and tricks that has kept us on track during our mission to purge.
Happy purging! xo Jacqueline and Lindsay  The first day of spring is March 20, 2019! We have it circled on our calendars, highlighted in our agendas, and have a five-day-out reminder set on our phones. (Can you tell we’re excited?!) To celebrate the start of a new season, we like to give our home a little love and make sure every room is ready for the sunny skies ahead. Check out how we’re making the switch from winter to spring in this month’s checklist.
Entryway When last November rolled around, we had our mudrooms and entryways crisp, clean, and organized. Everything was in its place and we were feeling good! Fast forward to today. Hats are mingling with scarves; solo mittens have sent out search parties for their mates, and boots tend to be anywhere but tucked neatly under the storage bench where they belong. So this month it’s time to take back this space! Anything that hasn’t been worn all winter will be put away or donated. We’ll be making room for wellies and raincoats and giving all door mats a good, deep clean. Lighter layers There’s a lot to love about spring and summer, and losing the layers definitely tops the list. And now that we have little ones, it’s even more of a thrill to know we won’t have to bundle them up every time we step outside. We’re breaking out the T-shirts and lighter sweaters and making sure closets are well stocked with short sleeve or sleeveless undershirts. Last year’s raincoats and rain boots are too small to carry over into this year, so we’re making sure they have the right sizes on-hand once the puddle jumping begins. Get out those green thumbs We are far from avid gardeners, but we have experienced the great rewards of reaping the fruits (and vegetables) of our labour. This month is all about making a garden game plan. If, like us, you’re unsure where to start, head to a garden centre. Staff are a wealth of information and are always happy to help. Fridge purge We’re on a mission to put a stop to the waste and this starts with meal plans and only buying what we need. But first, we'll be giving our refrigerators and cupboards a serious purge (and clean!). Purge dishes and glassware While we’re in the kitchen, we’ll also be attacking our dishes and glassware. Anything chipped or collecting dust can go. Cupboards don’t have to be stocked to the brim with bowls, plates and cups, so we’re making life easier by removing the clutter so we can find exactly what we need when we need it. Fresh florals We love the addition of fresh flowers in any space. Especially at this time of year when we’re over the snow and ready for spring. Beautiful blooms are just what we need to brighten our day! What’s on your to-do list this month? xo Jacqueline and Lindsay |
AuthorJacqueline and Lindsay are sisters and new moms living on the East Coast of Canada. Archives
October 2020
|
 RSS Feed